Test drive of the ride in van project – current level of progress.
Test drive of the ride in van project – current level of progress shows my Granddaughter at the wheel for the first time! The van follows the pattern of Postman Pats van and can be seen in the video below. I estimate I have 98% (ok 100% I just don’t want to jinx it!) of the design work complete. Some adjustments are required following the first real test drive. Proud Grandfather or no, didn’t she do well!
There were a couple of issues raised by the test run. First the universal joints were not man enough. What is annoying is that I suspected they were weak, but ‘hoped’ they would be ok. Secondly, it still needs more spring tension to fully take up the slack in the drive chain. The slack occurs between forward and reverse.
The seating and steering are now sorted and the main van body can be started as soon as the two issues above are dealt with.
Future progress
The build in full will appear on the site in the future. However, if you want to know more before then you can email me and I will be pleased to discuss. Now let the video do the ‘talking’, and listen to the drivers lovely laugh!
The resulting problems with the steering in the end proved to be a bonus. I had to look again at the universal joints(UJ). Normally I ‘over engineer’ but for some reason version1 of the UJ had only 5mm grub screws. The new joints had much larger bearing surfaces within the UJ body itself.
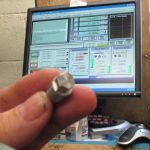
I designed a new stainless steel pin for want of a better word. First I ordered some 11mm stainless steel bar. I turned the end down to 45 degrees and then threaded one end 8mm. With hindsight I should have bought hexagonal bar because I needed a way to secure these pin and having a spanner friendly head would help assembly.
Making the Hexagonal tops to the pins.
After considering slotting the tops and screw then in I decided to use my RF25 CNC milling machine to cut the tops in a hexagonal way. The pictures and video below show how well this went, but as I said, I could have just bought the correct bar stock. Doh.